
Labels are tools for organizing and categorizing items, information, or files. They help you quickly identify and locate specific items within a group or system. Labels can be physical stickers or tags attached to objects or digital markers added to files or folders on a computer. They are commonly used in various settings, such as offices, warehouses, libraries, and homes, to maintain order and streamline processes. This post outlines 8 benefits of organizing with labels.
Benefits of Organizing with labels
Organizing with labels can be incredibly beneficial in various aspects of life. Here are eight benefits of organizing with labels:
1.Efficiency
Labels help quickly identify and locate items, saving time and effort in searching for things.
2.Clarity
Labels provide clear and specific information about the contents, making it easier to understand what is stored or categorized.
3.Organization
Labels help categorize items, ensuring everything has its designated place and is easily distinguishable.
4.Reduced Clutter
Proper labeling can prevent clutter by assigning designated spots for items, encouraging tidiness.
5.Inventory Management
Labels help you keep track of inventory, monitor stock levels, and know when items need restocking.
6.Accessibility
Labels make items more accessible to everyone, enabling easy retrieval for yourself and others.
7.Safety
Labels on hazardous materials or items with special handling requirements promote safety by indicating potential risks.
8.Consistency
Labels contribute to maintaining a consistent system of organization, ensuring that similar items are stored the same way and making it easier to stick to your organizational habits.
How to make inexpensive labels at home.
Creating inexpensive organizing labels at home can be a fun and creative project. Here’s a simple step-by-step guide to making your labels:
Materials needed:
1. Cardstock paper or index cards
2. Marker or pen
3. Clear tape or adhesive
4. Scissors
5. Optional: Washi tape, stickers, and colored pens for decoration
How to make organizing labels:
Decide on the size and shape of your labels. Cut the cardstock paper or index cards to your desired label size using scissors.
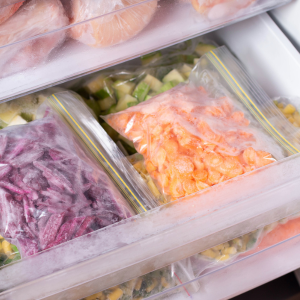
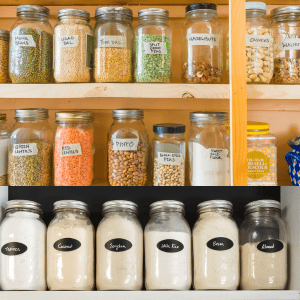
Write the labels using a marker or pen. You can create categories like “Breakfast,” “spices,” “Bathroom Supplies,” “Craft Materials,” “Stationery,” etc.
To make the labels more visually appealing, you can add decorative elements such as washi tape, stickers, or colored pens.
Once you’re satisfied with the labels’ appearance, you can cover them with clear tape or adhesive to protect them and make them more durable.
Cut out the labels from the cardstock paper or index cards using scissors.
Attach the labels to your storage containers, drawers, or bins using tape or adhesive.
These homemade organizing labels are not only budget-friendly and customizable but also give you a sense of accomplishment. They’re perfect for adding a personal touch to your organizing projects.
Enjoy organizing with your DIY labels and the empowerment that comes with it!
If you are unable to make labels, you can as well buy a label maker to make your work easier.
How to add labels to your organized collections
Adding labels to your organized collection is a simple and convenient way to categorize and quickly locate items. Here’s how to do it.
1. Select a clear and descriptive label for each category or group of items in your collection. For example, if you have a collection of books, you could use labels like “Fiction,” “Non-Fiction,” or “Mystery.”
2. Depending on the nature of your collection, you can use physical or digital labels. Physical labels can be stickers, tape, or tags attached to storage containers or shelves. For digital labels, you can add tags to files, folders, or digital collections on your computer or phone or use software to categorize and label items.
3. Determine the placement of the labels. Make sure the labels are easily visible and accessible to help you quickly identify where each category of item is.
4. Apply the labels consistently throughout your collection. Use the same format, font, and color for all labels to maintain a cohesive look and make navigating easier.
4. Review and update your labels regularly as needed. If you add new items to your collection or change the organization of existing items, update the labels accordingly. This ensures that your system remains accurate and efficient over time.
Adding labels to your organized collection saves significant time and effort when searching for specific items. It maintains a well-structured and efficient storage system, making tasks easier and more manageable.
Organizing with labels promotes efficiency, clarity, and order in your spaces, making day-to-day tasks easier and more manageable. By understanding the benefits of organizing with labels and methods of labelling, you can create a well-organized and efficient system that saves time and reduces stress.
Happy organizing and labeling!